
How to Prep Your Home for Sale: Win Buyers in 2026
Learn how to prepare a home for sale in North York. A practical, step-by-step plan for staging, cleaning, repairs, photos, and launch timing to win buyers fast.
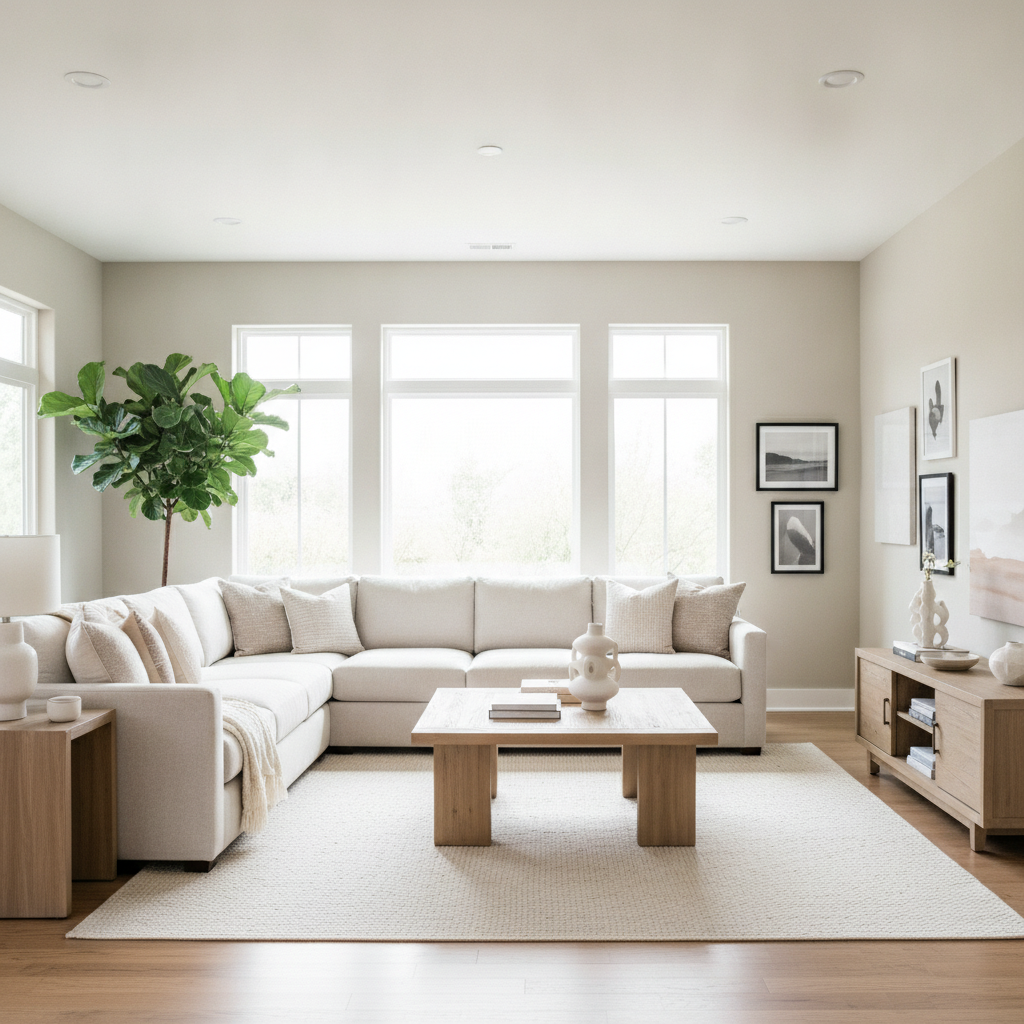
Preparing a home for sale is the focused process of repairing, decluttering, cleaning, staging, and marketing your property so it shows its best and attracts strong offers. In North York, timing, presentation, and local market data guide priorities. If you’re asking how to prepare a home for sale, start with a clear plan and sequence.
By Robin Patel — Founder & Realtor, RE/MAX METROPOLIS REALTY
Last updated: 2026-06-30
Overview
To prepare a home for sale, prioritize curb appeal, neutral paint, lighting, minor repairs, deep cleaning, and targeted staging. Build a 2–6 week plan, confirm your buyer profile, and launch with professional photos and a coordinated showing strategy to maximize first-week momentum and buyer confidence.
We’ll walk you through a practical plan we use with sellers across the GTA: what to do first, how to stage without over-spending, and the exact sequence to launch strong. You’ll see where small fixes punch above their weight—and where to avoid wasting energy.
- Follow a room-by-room punch list so nothing slips.
- Use neutral tones, layered light, and clutter control.
- Stage the living room, kitchen, primary suite, and entry first.
- Document repairs and upkeep to reduce buyer friction.
- Launch with polished visuals and tight showing logistics.
Local considerations for North York
- Highlight outdoor living and walkability—if your home is near Bond Park, stage a simple patio vignette to sell the lifestyle.
- North York traffic patterns pick up after long weekends; plan listing photos and open houses around those high-activity windows.
- If your audience includes students or staff commuting to Ace Acumen Academy, feature quiet study zones and easy transit notes in remarks.
Before You Start (Prerequisites)
Start with decisions, not paint. Lock your target list date, gather property records, request an agent-led walkthrough, and block time for decluttering, repairs, cleaning, staging, and photos. Agree on decision criteria so you only invest in updates that improve first impressions and inspection outcomes.
Preparation succeeds when it’s deliberate. In our experience, the best results come from a 30-minute planning call, a 60-minute walkthrough, and a written punch list you can execute in short sprints.
What to line up this week
- Timeline: Pick a list week and a preferred closing window; build backward.
- Records: Permits, surveys, warranties, utility history, and any renovation docs.
- Walkthrough: Ask us for a room-by-room list with high/medium/low priorities.
- Vendors: Shortlist a painter, cleaner, handyman, lawn care, and photographer.
- Staging plan: Decide on DIY, partial, or full staging; reserve rental items if needed.
Readiness checkpoints
- Safety first: Functioning smoke/CO alarms; secure railings; no trip hazards.
- Moisture: Fix active leaks; address odors and visible water stains quickly.
- Mechanical basics: Service HVAC; replace filters; quiet noisy fans; label panels.
- Lighting & paint: Choose warm neutrals; set bulbs to ~2700–3000K for inviting tone.
Homeowners tell us this pre-list structure reduces stress. It also makes it easier to say no to lower-impact projects, keeping your budget and time focused.
Step-by-Step Process: How to Prepare a Home for Sale
Move in sequence: declutter, depersonalize, repair, deep clean, paint, improve lighting, refresh flooring, stage key rooms, then capture pro photos and launch. Each step compounds buyer confidence, so avoid skipping ahead. Confirm progress with daylight photos at each milestone.
Here’s the method we deploy repeatedly, adapted to your property and target buyer. Tackle steps in order to transform from “lived-in” to “show-ready” without burnout.
- Declutter (30–40% edit): Remove extra furniture, floor items, and visual noise. Aim for 20–30% open shelf space and closets at ~50% capacity.
- Depersonalize: Store family photos and bold art; keep two or three neutral accents per surface.
- Minor repairs: Patch nail holes; repair door latches; silence squeaks; recaulk kitchen/baths; replace yellowed outlet plates.
- Deep clean: Windows (inside/out), baseboards, vents, grout, light fixtures, and appliance interiors. A “hotel clean” standard sells trust.
- Paint strategically: Refresh scuffed walls with warm light neutrals; unify trim color; touch up doors and baseboards.
- Lighting upgrades: Layer ambient, task, and accent light. Swap dim bulbs for bright, soft-white LEDs; add mirrors opposite windows.
- Flooring refresh: Steam-clean carpets; buff hardwood; replace cracked tiles; use neutral, low-pile rugs to define zones.
- Kitchen tune-up: New cabinet hardware; aligned door fronts; tidy pantries; spotless sink and hood; organized drawers with 30–40% free space.
- Bathroom spruce: White towels; new shower curtain and liner; recaulk/tile regrout where dark; polished chrome and glass.
- Curb appeal: Trim hedges; edge lawns; fresh dark mulch (2–3 inches); repaint the front door; power-wash paths and railings.
- Stage key rooms: Prioritize living, kitchen, entry, and primary suite. Float furniture off walls; add greenery; keep surfaces 70% clear.
- Pro photography & launch: Shoot at golden hour with blinds open; plan showings, open houses, and access notes clearly.

What buyers notice first
- Entry sightline: A clean line from door to a focal point (art or window).
- Light and air: Open drapes; elevate blinds; run HVAC quietly before showings.
- Smell and sound: Neutral scent; quiet fans; no dripping taps or buzzing lights.
Here’s the thing: buyers decide within the first minute whether a home “feels right.” Your job is to remove distractions and amplify light, space, and calm.
Troubleshooting: Fix Small Issues Before They Become Big
When feedback flags odors, darkness, clutter, or temperature, act within 24–48 hours. Deodorize at the source, add brighter bulbs, remove excess items, and pre-cool or pre-heat before tours. For inspection surprises, fix safety issues fast and document all repairs to protect momentum.
Every listing hits speed bumps. Fast, documented responses preserve leverage. Keep a simple log: the issue, the fix, the date, and the vendor if applicable.
- Odors: Identify the source; launder soft goods; ventilate; avoid heavy fragrances.
- Dark rooms: Add task lamps; swap heavy curtains for sheers; place mirrors opposite windows.
- Storage overflow: Short-term storage beats overfilled closets; aim for 50% space visible.
- Noisy HVAC: Replace filters; schedule maintenance; ensure quiet operation during showings.
- Inspection anxiety: Pre-empt with a tidy binder of receipts and a concise repair log.
We’ve found that a simple “48-hour rule” (address repeat feedback within two days) keeps tours steady and signals care to the market.
Advanced Tips (Optional Upgrades That Punch Above Their Weight)
After essentials, choose micro-upgrades with big visual payoff: swap dated light fixtures, add a smart thermostat, refresh cabinet hardware, and create a cozy outdoor seating zone. These changes photograph beautifully and suggest modern, move-in-ready convenience—without major renovation.
Optional doesn’t mean trivial. Done selectively, these updates change a buyer’s first impression in under an hour per item.
- Fixtures: Matte black, brushed nickel, or brass in entry/dining add instant polish.
- Smart home: Thermostat and video doorbell hint at lower maintenance and comfort.
- Textiles: Layer throws and pillows; repeat a neutral color story for calm.
- Outdoor focus: A small bistro set and string lights create “another room.”
- Garage/utility: Pegboard and labeled bins show functional storage without clutter.
Curious whether full staging is worth it? Explore this perspective on why staging matters to help decide how deep to go for your property and timeline.
Timing, Photos, and Marketing Discipline
Launch when your home looks its absolute best. Use professional photography, polished remarks, and a coordinated showing plan. Align your timing with local buyer activity to capture maximum first-week momentum and convert views to private tours.
Momentum compounds. Listings that launch cleanly tend to stack more early tours, which attracts more attention. That flywheel requires pro visuals, clear access instructions, and rapid inquiry response.
| Week | Focus | Owner Tasks | Agent Tasks |
|---|---|---|---|
| Week 1 | Declutter + Repairs | Edit, donate, patch, recaulk | Walkthrough, vendor lineup |
| Week 2 | Deep Clean + Paint | Top-to-bottom clean; paint neutrals | Photo schedule; remark draft |
| Week 3 | Staging + Yard | Stage key rooms; curb appeal | Final pricing; showing plan |
| Week 4 | Photos + Launch | Maintain show-ready state | Publish; syndicate; open house |
Thinking about seasonality? See a data-driven take on the best time to sell a house to plan around local demand surges and holidays.

Free Listing Readiness Checklist (Soft CTA)
Want a custom, room-by-room punch list? Request our listing readiness checklist and a quick consult. We’ll map high-impact fixes, staging priorities, and a four-week launch calendar tailored to your address and buyer profile.
- Room-by-room tasks with estimated time windows.
- Photo-day prep list (what to hide, what to highlight).
- Open-house playbook for steady weekend traffic.
Prefer a deeper dive on sequencing? This plain-English outline of the home selling process pairs well with our approach and helps set expectations for each milestone.
Applying This Plan with Robin Patel
We pair this checklist with your Comparative Market Analysis (CMA), our address-based valuation, and on-site staging guidance. The result: a targeted, efficient prep plan that highlights strengths, removes objections early, and builds buyer trust from day one.
Here’s how we implement for North York sellers—and how we keep it simple.
- CMA + buyer lens: We tailor prep to likely buyers (young families, downsizers, investors) and neighborhood comps.
- Address-based insight: Use our “What’s My Home Worth?” tool to frame updates against expected buyer expectations.
- Designations at work: ABR, SRS, and RENE guide staging choices and negotiation strategy once offers arrive.
- Photo plan: We schedule golden-hour exterior shots and sequence interior lighting.
Many sellers assume more projects equal better results. In practice, a 12-step essentials list, photo discipline, and documented maintenance wins more trust than sprawling renovations.
Frequently Asked Questions
Sellers ask about paint, staging, inspections, timelines, and what “show-ready” really means. These fast answers will keep your prep on track and aligned with buyer expectations in North York.
What rooms should I stage first?
Stage the living room, kitchen, primary bedroom, and entry before anything else. These spaces dominate buyer perception and photos. If time is tight, stage fewer rooms well rather than spreading effort thin.
Should I repaint before listing?
Yes. Fresh, neutral paint unifies spaces and hides wear. Focus on high-traffic rooms and any bold colors. Choose warm light neutrals and consistent trim for a move-in-ready feel.
Is a pre-listing inspection necessary?
It’s optional but helpful for older homes or when issues are suspected. Finding and fixing safety or maintenance items early can reduce renegotiations and keep closing timelines on track.
How clean is “show-ready”?
Aim for hotel-level clean: streak-free windows, spotless kitchens and baths, dust-free baseboards, and neutral scents. Closets and pantries should feel spacious and organized with visible empty space.
Key Takeaways
Prep is a sequence: repair, clean, paint, light, stage, and launch. Keep closets half-full, surfaces 70% clear, and lighting warm and bright. Photo discipline and fast feedback loops protect first-week momentum—the most valuable window for strong offers.
- Focus on the first 60 seconds of a showing—entry, light, scent, calm.
- Document maintenance and repairs to reduce buyer friction.
- Stage fewer rooms deeply; keep your color story neutral and cohesive.
- Plan photos and open houses around North York demand peaks.
Additional Resources
Use this guide alongside your CMA, address-based valuation, and a simple four-week calendar. When in doubt, prioritize clean lines, light, neutral color, and quiet mechanicals—these cues reassure buyers and make your photos work harder.
- Comparative Market Analysis (CMA) to prioritize upgrades by impact.
- Room-by-room photo checklist for launch day.
- Open-house preparation list for consistent weekend traffic.