
Ontario Home Selling: Save Time & Stress Before You List
Your Ontario home selling checklist: 12 steps, pricing strategy, legal milestones, marketing, tools, and local tips for Brampton and Toronto sellers.
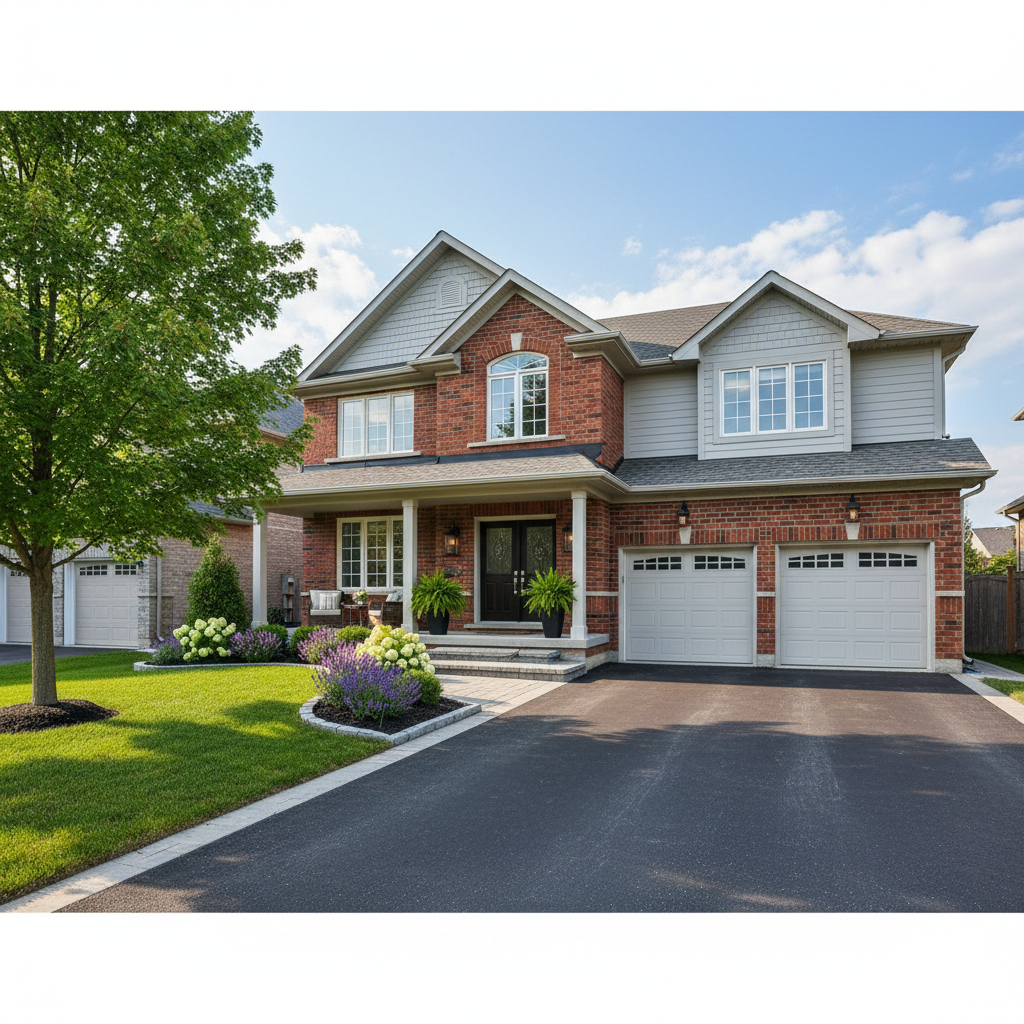
An Ontario home selling checklist is a step-by-step plan that guides homeowners from prep to closing. It covers valuation, staging, disclosure forms, MLS exposure, offers, conditions, and key timelines. From our Ontario base at 52 Scarsdale Rd, we help Brampton and Toronto sellers follow this checklist using CMA, address-based valuation, and proven marketing.
By Robin Patel — Founder & Realtor, RE/MAX METROPOLIS REALTY
Last updated: May 7, 2026
Overview and table of contents
This guide organizes your Ontario home selling checklist into clear phases: plan, prepare, promote, negotiate, and close. You’ll see step-by-step tasks, timelines, legal notes, and pro tips we use with Brampton and Toronto clients. Skim the summary, then dive into the sections you need.
Here’s how to use this complete guide. Read the summary to spot gaps, bookmark the timeline, and follow the 12-step checklist. Each section includes quick wins, examples from local sales, and tools you can act on today.
- What an Ontario home selling checklist includes
- 12-step process from prep to possession
- Pricing without numbers: how to set list strategy
- Marketing and showings that attract strong offers
- Ontario paperwork and legal milestones
- FSBO vs agent vs discount: comparison table
- Best practices, tools, local tips, and FAQs
What is an Ontario home selling checklist?
An Ontario home selling checklist is a structured sequence of tasks to prepare, market, negotiate, and close a residential sale under provincial rules. The checklist aligns valuation, staging, disclosures, offers, and closing dates so you avoid delays, renegotiations, or preventable fall-throughs.
Think of it as your playbook. Sellers who follow a checklist hit milestones on time, reduce days on market, and move with less stress. We map each task to a target week, assign owners (you, us, lawyer), and keep documents organized for quick decisions.
What’s inside the checklist
- Valuation: address-based estimate plus Comparative Market Analysis (CMA)
- Preparation: repairs, decluttering, deep clean, staging, pre-list photos
- Compliance: forms, disclosures, ID verification, condo docs if applicable
- Marketing: MLS entry, pro photos, 3D walkthroughs, showing logistics
- Negotiation: offer review, conditions, timelines, counters
- Closing: lawyer coordination, keys, utilities, move-out checklist
We tailor this for Brampton neighborhoods and the Toronto metro so timing, school calendars, and commuter patterns work in your favor.
The 12-step Ontario home selling checklist
Follow these 12 steps: define goals, pre-inspect, fix fast defects, declutter, stage, price with a CMA, launch MLS, manage showings, review offers, negotiate conditions, finalize with your lawyer, and hand over keys. This order keeps momentum and protects leverage.
- Clarify goals and constraints. Rank speed, certainty, and sale terms. Identify your earliest move date and any must-have clauses.
- Baseline valuation. Use an address-based estimate, then refine with a local CMA comparing active, pending, and sold listings within 60–120 days.
- Pre-list inspection mindset. Whether formal or DIY, document roof age, furnace filter dates, and visible wear. It limits surprises during buyer due diligence.
- Repairs with ROI. Patch drywall, re-caulk wet areas, replace tired bulbs with consistent color temperature, and service the HVAC.
- Declutter and deep clean. Remove 30–40% of items from closets and counters; depersonalize photos. Clean windows inside/out for brighter rooms.
- Stage to the buyer. Neutral textiles and balanced furniture scale rooms. Add fresh greenery and warm lamps for evening showings.
- Price with strategy. Choose a pricing lane: market-aligned, value-banding to widen search ranges, or under-listing to concentrate attention.
- MLS launch. Use crisp copy, accurate room sizes, and a logical photo order (exterior → main spaces → beds/baths → lower level → yard).
- Showings and feedback. Standard windows run 30–60 minutes. Capture feedback patterns to adjust photo order or highlight features.
- Offer review plan. Pre-set evaluation criteria: financing confidence, deposit timing, conditions length, and closing flexibility.
- Negotiate and firm up. Keep points few and meaningful. Aim to firm within the agreed condition period to reduce fall-through risk.
- Close and transition. Lawyer receives documents, you schedule movers, transfer utilities, and complete the move-out checklist and key handoff.
In our experience with Brampton sellers, aligning steps 5–9 within a two-week window preserves energy and keeps your listing fresh.
Pricing without numbers: how to set your list strategy
Set price by triangulating a CMA, on-market competition, and buyer search behavior. Instead of chasing a number, choose a strategy that maximizes eyes on your listing and supports clean terms. The right lane reduces days on market and protects negotiation leverage.
We use three inputs: historical sales, current absorption, and live buyer search ranges (how people filter online). This helps decide whether to price into a search band or anchor at market to signal confidence.
Signals to watch
- Inventory trend: the ratio of actives to recent sales indicates negotiating power.
- Showing velocity: early-week views and weekend bookings reveal fit and photo impact.
- Offer quality: deposits, conditions, and closing flexibility can outweigh a nominally higher sticker.
Action plan
- Run a CMA for 3–5 true comparables with similar lot, age, and upgrades.
- Pick a pricing lane (market-aligned, banded, or attention-focused) and commit for one review cycle.
- Collect objective signals in week one: saves, shares, showing-to-view ratio, and consistent buyer comments.
For sellers in the Toronto metro, buyer commute patterns and school calendars can add urgency in spring and late summer. We time strategy to those windows.
Marketing and showings: exposure that drives offers
Great marketing makes buyers feel at home before they walk in. Use pro photos, clear floor flow, compelling MLS remarks, and smooth showing logistics. The result is more qualified foot traffic and stronger offers with fewer conditions.
Strong exposure starts with accuracy and narrative. We script the order of photos and write remarks that connect features to everyday life: storage that simplifies mornings, a yard that hosts a dozen guests, a location that cuts commute time.
- Photos and media: wide exteriors, bright kitchens, primary suite, backyard; add 3D tours for clarity.
- MLS remarks: highlight unique upgrades, recent maintenance, and utility of each zone.
- Showing flow: stack after-work and weekend slots; keep lights on and blinds open.
- Feedback loop: update remarks to address repeated questions (parking fits two, fenced yard, etc.).
For more ideas on positioning and exposure, see this practical Ontario home marketing guide. It aligns with our emphasis on clarity, consistency, and convenience for buyers.

Ontario legal and paperwork milestones
Ontario sales rely on clear paperwork: listing agreement, Form 801, offer documents, IDs, and condo status if applicable. Keep versions tidy, dates accurate, and signatures complete to avoid delays. Your lawyer coordinates title search, statement of adjustments, and key transfer.
Organization reduces risk. We maintain a document room with version control so your acceptance, conditions, and any amendments are traceable. Condominium sellers should order a status certificate early to keep condition periods short.
- Core documents: listing agreement, MLS data form, marketing authorizations, identification verification, and feature sheet accuracy.
- Offers and conditions: financing, inspection, review of condo status, and buyer verification steps.
- Lawyer tasks: title search, statement of adjustments, coordinating mortgages and lien payouts, and key handoff logistics.
For a seller-friendly overview of the legal flow, review these property sale legal steps. While each transaction differs, the sequence helps you prepare signatures and IDs in advance.
FSBO vs full-service vs discount: which path fits you?
Choose your selling path by weighing control, time, and risk. Full-service representation streamlines tasks and negotiation. FSBO offers control but increases admin and compliance burden. Discount options vary by inclusions, so compare deliverables—not slogans.
| Approach | Pros | Trade-offs | Best for |
|---|---|---|---|
| Full-service agent | End-to-end guidance, marketing, negotiation, coordination | Requires trust in your advisor and a shared plan | Busy owners, first-time sellers, timing-sensitive moves |
| FSBO | Maximum control over showings and messaging | High admin load; legal, safety, and negotiation complexity | Seasoned sellers with time and comfort managing contracts |
| Discount/limited-service | Selective services; a la carte add-ons | Gaps in marketing or negotiation can affect outcomes | Owners who can fill missing pieces confidently |
If you’re considering any hybrid, request a deliverables list: media count, syndication, showing coordination, and who negotiates counters.
Best practices to maximize your result
Small improvements compound: bright lights, fresh caulk, neutral staging, accurate MLS data, and responsive showing windows. Pair that with a clear offer-evaluation rubric and a focused counter strategy. Execution beats improvisation in competitive markets.
Preparation wins
- Replace mixed light bulbs with a uniform temperature to avoid color casts in photos.
- Service furnace and clean vents to present a well-maintained home.
- Stage with three focal accents per room—never cluttered, never empty.
Marketing clarity
- Lead with five hero photos and keep secondary rooms crisp and well-lit.
- Order photos by buyer flow: entry, main living, kitchen, primary, outdoor.
- Answer FAQs in remarks: parking, storage, recent updates, noise, and sunlight.
Offer and closing
- Set a pre-meeting checklist: buyer qualification, deposit timing, and condition length.
- Negotiate few, meaningful points to avoid fatigue and confusion.
- Confirm utility transfers and moving logistics one week prior to possession.
Tools and resources for Ontario sellers
Use an address-based home value estimate, then validate with a CMA. Pair that with a photo-ready staging checklist, a showing calendar, and a move-out plan. These tools keep you confident from launch to keys.
Our toolkit includes location-based search to monitor competition, a “What’s My Home Worth” estimator for instant direction, and VIP reports that explain current absorption and buyer behavior. A broader perspective on valuation can be found in this Ontario value guide, which aligns with our emphasis on comparable quality and recency.
Local considerations for Ontario
- Show near community anchors like Bond Park during daylight to highlight green-space access in photos and remarks.
- Plan around winter weather and spring thaw; snow and mud affect curb appeal and access—keep paths clear and mats ready.
- Weekday commuter patterns in Toronto favor early-evening showings; align lighting and thermostat for comfort.

Timeline and readiness: a simple process map
Map your sale in four sprints: 30 days out for repairs and staging; 14 days for media and forms; 7 days for MLS prep; 3 days for final polish. This cadence keeps quality high and stress low.
| When | Focus | Checklist highlights |
|---|---|---|
| 30 days out | Repairs & planning | Service HVAC, patch/paint, schedule media, gather records |
| 14 days out | Staging & media | Declutter, deep clean, stage, pro photos/3D, draft MLS |
| 7 days out | Pre-launch | Finalize remarks, sign forms, book showing windows, sign on lawn |
| 3 days out | Polish | Windows, lawn, touch-ups, scent-neutral, lockbox installed |
We adapt this sprint map to your move date, school schedules, and work travel so the process fits your life.
Buying guide for sellers: picking your next place while you sell
Coordinate sale and purchase by nailing three decisions early: buy first or sell first, bridge timing with conditions, and pre-approve financing. A synchronized plan avoids rushed choices and protects your negotiating power on both sides.
Most sellers are also buyers. We build a dual-track timeline so you can preview target neighborhoods, set alerts, and be offer-ready without pausing your listing momentum.
- Buy first vs sell first: choose based on equity access, risk tolerance, and local supply in your target segment.
- Conditional protection: when needed, align condition periods to reduce overlap stress.
- Search discipline: set filters by commute, school routes, and must-have features to avoid detours.
Case studies: two Brampton sales, two strategies
Strategy should fit the property, not the other way around. We showcase two Brampton examples—one attention-focused, one market-aligned—to illustrate how pricing lane and staging choices shaped showings, offer quality, and closing timelines.
North-end family home
We prepped with paint, lighting, and yard cleanup, then chose a market-aligned price to signal quality. Showings concentrated over the first weekend with strong deposits and short conditions. The clear narrative—space for homework, storage for gear—resonated with buyers.
Townhome near transit
Here we used a banded pricing lane to widen search filters and maximize eyeballs. A clean photo order and a sharp feature sheet cut repeat questions. The result: multiple clean offers and a closing date that matched the seller’s move-out needs.
FAQ: Ontario home selling checklist
These are the most common seller questions we answer in Brampton and Toronto. The direct, practical guidance below is designed to keep your sale organized, compliant, and on schedule from prep to keys.
What should I fix before listing?
Focus on high-visibility, low-friction fixes: paint touch-ups, caulking, lighting consistency, door hardware, and minor landscaping. Service the HVAC and clean windows. These small wins make photos pop and reduce buyer objections during showings.
How long should showings be?
Thirty to sixty minutes per showing is typical. Stack after-work and weekend windows. Keep lights on, blinds open, and instructions clear. Capture feedback to refine photo order or MLS remarks if questions repeat.
Do I need a pre-list inspection?
It’s optional but helpful for older systems or visible wear. A pre-list review—formal or DIY—lets you repair small issues that might become negotiation points. The goal is fewer surprises and shorter condition periods.
What if I receive multiple offers?
Use predefined criteria: buyer qualification, deposit strength, condition length, and closing flexibility. Compare the whole offer, not just the headline number. Aim for clean terms that align with your move timeline.
How do I coordinate closing day?
Confirm key transfer time with your lawyer, finish the move-out checklist, and leave manuals and extra keys on the counter. Photograph meter readings, set utility transfers, and lock windows and doors before handoff.
Key takeaways
A clear Ontario home selling checklist keeps your project on time and stress low. Prep smart, price with a strategy, market with clarity, and negotiate with focus. Document everything and coordinate early with your lawyer and movers.
- Sequence matters—group prep tasks, then launch decisively.
- Price is a strategy, not a fixed number; watch signals and adjust.
- Strong media, remarks, and showing logistics attract better offers.
- Paperwork accuracy prevents delays during conditions and closing.
Next steps
Ready to list? Start with a quick address-based estimate, schedule a CMA-backed walkthrough, and map your 30–14–7–3 sprint. With a clear plan, your listing can launch confidently and close smoothly.
Friendly next step: Book a brief call to align your goals and timeline. We’ll review your home’s strengths, current competition, and the best launch window for your area.
For additional background on messaging and exposure choices sellers face, this concise FSBO vs representation explainer outlines trade-offs similar to our comparison table above.